Thursday, July 24, 2014

Ka-what?... Kahoot!

It's been a little while, friends!

I apologize for my tardiness in blogging. This blog was a major focus of mine while finishing up grad school this May (I'm done!!! Whooo!) and then after the chaos of the last few weeks of school, I desperately needed some downtime.

After 3 weeks of laying by the pool, catching up with old friends, and reading at least 5 books, I'm starting to think about school again. :)

This is the second summer where I have also spent time teaching technology professional development sessions for teachers in my district. I really enjoy spending time sharing my ideas about technology integration with my fellow teachers in Beloit, and it renewed my passion and interest in my blog as well.

So... DO YOU KNOW ABOUT KAHOOT?!


If you don't, oh boy, let me tell you! At both of my sessions this week (one was about Using iPads for Assessment, and a second was about all aspects of Google Apps for Education), Kahoot was a major hit and was named by my attendees as the thing they would remember.

Kahoot is a website for creating online quizzes, but not just any quiz - this quiz really reminds me more of a trivia game - you know, the trivia game you play at the bar on Thursday nights?

The user creates a quiz on the Kahoot website (or searches the public quizzes to find one that might meet their needs) and when it comes time, starts the quiz. A game pin appears, and all the players enter that game pin on a separate website. Since this is a website and NOT an app, it's accessible on ANY device that can access the internet - including cell phones, for any of you who may be in a BYOD scenario. (Here is the site for creating a Kahoot account and creating quizzes.)

Anyway, after accessing the site (this is the site the players go to) and entering in the game pin, players type their name, and once everyone has entered the kahoot "lobby" you can start the game! Below is a picture of the "lobby":


The question and choices appear on the teacher's device (Computer, smartboard, iPad) and on the player's devices they see 4 colored boxes, and have to, as quickly as they can, click on one of the four boxes which contains their answer. Students receive "kahoots" (points) for answering quickly and correctly.

Here is what appears on the SmartBoard:


And here is what kids see on their screens:


And after answering the question:


You see a running tally after each question:


Kids get more points for answering quickly and accurately, and at the end, the winner is announced:


It is SO MUCH FUN! I did a Kahoot quiz with my math class this year as a review for math vocabulary words, and they begged me to do another one literally once per day for the rest of the year.

The account on the Kahoot site is free, and the quizzes are very simple to make. You can include photos as part of the question as well, which is nice. Once you've created the Kahoot, you can list it as public to share with colleagues, or share with them individually. If someone else has created a Kahoot that you like, you can also duplicate it to your own account and then adjust it as you want.

Once the quiz is over, you can also download a spreadsheet that will give you an analysis of each question and each student, making this a spectacular tool for formative assessment.


The only flaw: in my particular the building, the WiFi is pretty good but not awesome. The players do occasionally get booted off. We have had many discussions about being a good sport if they get booted off, and either waiting patiently to be allowed back in, or join up with a friend sitting next to them. But, I have found that if you keep your Kahoot quiz to 5-10 questions, you should do alright - unless you happen to have awesome WiFi in your building. ;)

What could you do with this?

Kahoot is obviously wonderful for end of unit reviews, pretests, or any other type of formative assessment. It would also be fun to have students create the Kahoot quizzes and then give them in small groups.

Enjoy Kahoot! I'll see all of you soon... er rather than later! :)

Monday, April 28, 2014

Wish You Were Here...

This is my fifth year of teaching fifth grade in the same school, and one thing that is really nice about teaching the same grade is becoming an expert on certain topics. There are some lessons that I teach that have been so honed and perfected over 5 years of teaching that they always tend to go well.

On the other hand, there are a few lessons or units that I do differently every year. One of those is the study of the regions of the United States. I've never been crazy about the way it's "supposed" to be taught (the whole class looking at each region of the U.S. individually, reading books and watching movie, and then taking a test on each region). I've done this unit lots of different ways - splitting them into groups and jigsawing the regions, having them create posters, videos, maps, etc.

This year I knew I wanted to use the iPads somehow, and I really do like what I came up with. Instead of starting with the regions and then looking at the individual states, I started by having students research one state each.


I created the above worksheet for them to use to research their states (which, consequently, can be found for sale here) and gave each group a page of QR codes leading them to good websites for state research (there are a ton!)

So here's the good part: what did I want them to create after researching their state? Like I said, in the past it has always been a presentation of some sort (poster, video, etc). But, I've always had the idea and wanted to do a postcard, so that's what I decided on - my students are creating a photographic postcard, and then writing a letter about an imaginary trip to their state.

The students are using the app PicWall to create their postcard, by collecting photos from the internet. This is a very simple app, just making a collage out of photos from the camera roll, with some fun features like adding in stickers and text. 

I am amazed at the results that my students are coming up with! Take a look...


Gorgeous, right?? That definitely makes me want to go to Hawaii...

As if that weren't cool enough, the next step in the project is for the students to imagine that they have taken a trip to their state, and, using their research, write a letter to a friend describing their trip. They are then using the Pages app to put it all together - insert their postcard, and type their letter beneath it.
I am really enjoying this project! The students are creating some awesome designs on their postcards, and very clever letters.

My next step: put them together in region groups based on the state they researched, and look at what all their states have in common - what makes them a region! :)

Saturday, March 1, 2014

Storybuddy and Skitch for a Nonfiction Features Dictionary

Recently my guided reading group was looking at nonfiction features, and as I'm sure many of my colleagues have done before, we made a Nonfiction Features Dictionary. First, we brainstormed a list of all the features of nonfiction text (bold words, table of contents, diagrams, photos, etc). Then, they had to look through their most recent nonfiction text (and any other book they could find) to find examples of these features. They used their iPads to take pictures of each of the features.

After taking the pictures, they used Skitch to annotate the pictures. Skitch is an app to do just that - you grab a photo from your camera roll, and you can write, type, draw, or otherwise edit the photo. Once you're done with the photo, you can save it to the camera roll (it will save the original AND the edited versions), print it, or email it. Skitch also connects to Evernote, for those of you who are Evernote users! Skitch is an awesome app for editing photos to be used with a variety of apps, not just Storybuddy!

Here's an example of the nonfiction features photos with edits:


Students needed to say what type of feature it was, as well as how it helps them become better readers and understand nonfiction text better.

Once they had done this for all of their nonfiction features photos, they assembled all the photos into one book using Storybuddy. This app has the user create an e-book by putting in photos, drawings, and text. Students can even record their own voice and attach it to each page of the book.


Once the story is finished, it can be read within StoryBuddy, or it can be exported to iBooks, or can even be emailed or printed as a PDF. We have the free version, which means you can only have 2 stories at a time within the app. However, if students export their finished stories to iBooks and then delete the story from StoryBuddy, they can create more than 2 stories.

Just one of the MANY ways to use these awesome apps!

Monday, February 24, 2014

Gotta Get This App - Geoboard!

Can we just bond for a moment, as elementary school teachers, about the HORROR that is geoboards?!?!?!

Honestly. I get it... they're great... hands-on learning and all that good stuff... but the rubberbands fly everywhere, and they snap on the kids' fingers, kids are stealing them and you're taking them away from kids for days afterwards... ugh.

This app is the saving grace... Geoboard!

It does exactly what that physical geoboard does - gives you pegs and VIRTUAL (thank god!) rubberbands that you can stretch into shapes.


You can also switch between a small square geoboard and a large rectangular one.


Another cool benefit: you can fill in the shape that you make on the geoboard with a color.


How did I use this app?

My students were learning about area of unusual shapes. We would make the shape on the virtual geoboard, and then use the red rubberbands to trace the individual squares, so they could see how the squares were split in half (or rectangles split in half) and add up the pieces to find the total area.


Go Get This App! ;)

Tuesday, February 11, 2014

Quickie (but a goodie!) - App of the Week

It's going to be a quickie this time, since I'm in the midst of preparing for parent/teacher conferences!

When using my class iPads this year, I was frustrated by the amount of apps at times. Yes it's cool to have all the apps we have on our student iPads... but every time I wanted to do a new project, I had to build in an extra 30 minutes of instruction to teach them how to use the app I wanted them to use. Yes I could do this at times - but when you think about the 30+ apps on our iPads... that's a lot of minutes!

My solution to this problem was to create "App of the Week."

Each week I choose an app (and I am strategic about my choices, often choosing an app that I know I want to use in the near future for a project) and put its name on the board for the whole week. Then, on Fridays, we have "iPad Free Time" - a time when they have free choice on the iPad (so long as they don't have any missing work). We start out iPad free time with a 5 minute info session.

And who teaches them how to use the "App of the Week"?

Not me - the kids! :)

All week they have seen that app's name on the board, and many of my students are very capable and eager to learn the app on their own. Then, during our iPad time, I choose one student to become the teacher and teach their classmates how to use the app.

Not only has this been a big time-saver for me, but it's been empowering for my students as well!

That's my quickie tip. :) Enjoy!

Thursday, January 30, 2014

What's a QR code... and why do I care?

What's a QR Code?: A QR code is kind of like a barcode. You may have seen it on promotional materials for various companies. You use a Smart Phone or tablet to scan the QR code using a QR Reader app (there are MANY out there, they are usually free. I recommend i-nigma or QR Reader). After you've scanned the QR code, a variety of things can happen depending on what type of code was created: a website may open up, words may appear on your screen, or contact information may be given.

(Scanning this QR code will bring you to a YouTube video on the Magic 7 method of long division)


How is this useful in education?: One of the main benefits of QR codes is that it gets you to a given website quickly and easily - so, rather than having students or their families type in a long URL address, they can just scan the code and immediately be taken to the website in question.

So, some ideas for how to use it: 

  • if students create videos, this is an easy way for their families to view them, or for students to view each others' videos. 
  • If students are doing a research project on the iPads, you could make a sheet with QR Codes for useful websites for them, and then they would only have to scan the QR code to get to the website rather than typing in a long URL. (Check out this entry for an example!)
  • Similarly, you could make little booklets with QR codes for commonly used sites (First in Math, Odyssey, Coolmath, etc) to get them quickly and easily to the site. Or, you could make QR codes for those high-frequency sites and post them around the room.
  • You could have a QR code posted in your classroom on Open House with your contact information for parents to scan. 
  • You could have a scavenger hunt in the classroom - if they think the answer is A, scan QR Code A, if it's B, scan QR code B, and then words would appear on their screen telling them if they're right or wrong, or telling them where to go next on the scavenger hunt, etc.
  • Create self-checking websites for centers - create a QR code that, when scanned, will tell students the answer to a problem, then create one code for each question.
  • Also for centers: have QR codes for YouTube (or your own self-created) videos to help them through the work for that center, so you're basically duplicating yourself.
...and that's just a few ideas!


Okay, you've sold me... now how do I MAKE one of those things?: Some of the QR code apps allow you to create codes on your iPad. Otherwise, there are free website for creating QR codes: www.the-qrcode-generator.com, or www.qrstuff.com. Go to one of those websites, choose what type of QR code you are creating on the left, and then input your information.

Important note: If you want to use QR codes for PHOTOS or VIDEOS, these photos or videos HAVE to be stored ON THE INTERNET somewhere PUBLIC (where anyone can get to it). So, for example: you could record a video using your iPad, upload it to your Dropbox, get the link to it off the website, and then create a QR Code for that link. (This is how I did the book commercial project in the hallway). This is not the ONLY way to do it, but it's one way that I have found works pretty well.
So what do I do with the code once I have created it?: Again, this depends on what you want to do with it. The best thing to do is to SAVE the image (either to your photo roll on an iPad, or just save it as a photo file to your I Drive on a computer), and then you can print it, insert it into a document or a presentation, show it full screen on the SmartBoard, etc.

How do YOU use QR codes in the classroom?


Tuesday, January 21, 2014

Reinventing the Research Process

It's really unfortunate to me how social studies has been mistreated by education over the last few years. I understand just as well as everyone else the pressures put on teachers in the areas of math and reading. Of course our students need those basic skills... however, many schools have handled the problem of lack of time by taking time away from science and social studies, and this is a huge disservice to our kids! These are some of their favorite subjects - and why can't we incorporate literacy and math skills into those subjects?

In social studies in grade 4, we focus on the history of our state (Wisconsin), and then branch out to looking at the regions of the United States. For anyone not from Wisconsin, Native American history is big in this area of the country, and has a huge impact on the culture of our state as it is. 

Let me give you a little before-and-after glimpse into how I taught Native American history of Wisconsin:

Before: I split students into groups ("tribes"), each one studying a different tribe native to Wisconsin. (Ojibwe, Oneida, Potawatomi, Ho Chunk, and Menominee). Within the groups, each person would research a different aspect of tribal life (food, shelter, clothing, language, history, etc). Students would read books and do a little internet research, jotting down notes on a lined piece of paper. Then, the final product: they would write a 5 sentence paragraph about what they learned and draw a picture to go along with it, and I would use the photos and paragraphs to create a little poster display.


The problem: Pretty boring, to be honest. Not a BAD activity, but definitely not one that engaged my students in higher levels of thinking or creativity. I constantly struggled with the research aspect of it. Students had lots of problems finding appropriate and relevant information, using an efficient note-taking process, and then struggled again with putting the information into their own words and writing the paragraph. I would teach these literacy skills as best I could, but as I'm sure all experienced teachers know, some would catch on and some would totally miss the point.

After: We recently started this unit, with several changes in mind. The basic set up is the same, but I utilized the jigsaw idea even more. Before starting research, I had all the topic groups work together (the foods, the shelters, etc) to create a list of questions - what did they want to learn? They also picked out of their list of questions which ones were most crucial.

Then, they created a mind map using the app iBrainstorm. This app is very simple - Post Its and a marker on a corkboard - but it's awesome for helping students flesh out their ideas. Since this was our first time using it, we all created essentially the same mind map (topic in the center, with the questions coming out of it). My hope is that as we continue to use this app more, they will be able to create their own mind maps to help them visualize their ideas.


The students are still doing book reserach, but I also created QR codes using this website. I found several good websites ahead of time, and then created QR codes for easy access - this way we can avoid the dreaded Google Search (which, as we all know, either ends up with students finding inappropriate material, or finding nothing due to too vague or too specific search terms).


They are going to keep track of their research right in the iBrainstorm app (by creating new post its with answers and connecting them to the questions they address) and then use a worksheet I created as a Google Doc (using the Google Drive app) to plan out their final product. 


The final product is going to be a presentation using the app 30 Hands. This app has students insert pictures, text, etc, and then record their voices going through each of their slides, and produces a video. The students will plan out what they want to say based on their research, and find photos to match it. Once they're done, I plan to have them watch each others' videos and fill out a graphic organizer so they are truly learning about all 5 tribes. 

The solution: The project now has really stepped up on its use of inquiry - the students are researching these topics because they're interested, and they have developed the questions to guide them in their search - and they also understand the research process better. They are working more collaboratively (both in their topic groups and their tribe groups) and will give more feedback on each others' work. They are still reading and writing, but are using tools to help them organize and structure information, so I'm not punishing those students who struggle with these types of tasks. Not to mention - the students are so excited! Much more so than when we were writing sentences and drawing pictures.

Phew! This first blog entry was a big one. It's a big project! I'll keep everyone up to date as the project unfolds!

Tuesday, January 14, 2014

Time for a change...

Obviously it's been awhile. :)

A lot has changed for me in a year... (almost done with my Master's of Instructional Technology degree, teaching technology PD for my district and others, in my first year of teaching in a 1:1 iPad classroom, etc...)

All of these changes have now brought me back to this blog, with an idea for a change in direction.

Let me start by telling you all this: at the beginning of this year, I had a class set of iPads. I was already 1 year into my graduate degree and 1 year into my position as Innovation Coach in my district (a technology teacher-leader). And yet, even with all these amazing devices at my fingertips, I found myself barely using them, and even when I did use them, it wasn't for the type of transformational change that I had always thought and taught about. I came home feeling guilty, that guilt magnified every time someone referred to me as a "technology guru"or something along those lines. What right did I have to call myself an expert in instructional technology when all I was doing with these iPads was playing games?

All that changed right before winter break this year. I attended an awesome conference, and while I was there, I made a list - I took everything that I had learned about quality technology integration and iPad usage in the classroom, applied it to MY classroom, and then made a list of all the things I wanted to do, in order.

Since then, I have been implementing these projects one by one. Some of the projects are just logistical things to make my and my students' lives easier, but others really are stepping in the direction of that transformational change I've always been so excited about.


I have to tell you: it has made a BIG difference. First of all, I have come home from school every day happy and excited instead of frustrated. Wow! That's huge. Also, and I know this sounds like a cliche that can't possibly true... but since I decided to go whole-hog into this technology integration idea and changing the way I do business in my classroom, I have not had a single serious behavior problem, and the work that my students are creating blows me away. Not to mention that when we do things in class that aren't technology related, even then they are more focused and engaged in the activity.


As I'm ending my master's degree, one of my final projects is going to be to keep my colleagues updated on the things I'm doing in my classroom. I have a unique position in that I am not a full-time trainer, I am still a teacher, as well as being a technology coach. I think it would be really beneficial for my fellow teachers to see what I'm doing, to make it easier for them to envision it working in their own classrooms.

So, I've decided to renew this blog, with a new focus on my technology-related projects in the classroom. Of course if some brilliant idea strikes me that's not technology-related I may still blog about it - technology isn't the answer to everything, after all! But I truly believe that I have found my calling in life, and I'm excited to use this blog as a vehicle for sharing my ideas.

Sunday, February 24, 2013

Motivating the young'uns...

Well it's been awhile!

I blame it on parent/teacher conferences... not really, those are actually this week, so I'm not sure why I'm making a post before this heinous week! haha ;)

We've been talking a lot at my school recently about motivating students to do their best on standardized assessments. All of us as educators know how unfair these can be... how it's such a slim snap shot of what a child is capable of, and how unfair it is to judge a child based on a few questions during a few hours of their educational career. That being said, those tests aren't going away! And we have to come up with ways to motivate our students, to see the value of those tests, and to help them understand why they take them and what we are looking for.

Our district takes the MAPS assessment 3 times a year, and as those of you who use this test know, what we look for most is growth and improvement. Each child has a "targeted growth" score, which is the goal that NWEA sets for them based on their previous performances of what they should achieve by the end of the school year.

Of course, I spend time before the test talking about it with my students - I'm pretty frank in explaining why we take it ("We teachers are looking to see if you're learning everything a 4th grader should be learning, and if you're improving - the point isn't getting the highest score, but in beating your previous score") and we set goals together (I blogged before about my goal-setting worksheet found here).

So how do I motivate them to take the test?

...candy, of course!


After the test, each student receives a little baggie, with a candy (either M&Ms or Skittles) for each point they improved on the math and reading tests combined, along with a cookie and a note saying "You are one smart cookie!" - an idea I cannot take credit for, as I borrowed it from my awesome coworkers.

In an ideal world, this motivation would be intrinsic - obviously I want my students to WANT to learn and grow and improve. But again - this is the real world. And in the real world, studies show that kids in poverty (like the kids I teach) do not look at long-term consequences, either positive or negative - they live in RIGHT NOW... and right now they want some candy.

Besides, it's a great visual - although some might balk at the fact that some students receive baggies full of candy while others receive only a few small pieces - it's a great visual representation and reward for how hard they have worked.

It's not ideal... but on my MAPS test this winter, my students earned a total of 361 candies for points improved in math and reading! I'm very proud of them for that.

Friday, December 7, 2012

Long time no see!

Okay, so it's been awhile... I blame it on the holiday season. (Plus my crazy job... plus grad school... plus tutoring... etc etc etc, you get the picture).

I did have time to add something to my Teachers Pay Teachers store today... Literature Circle role sheets!


Literature Circles are one of the (unfortunately few) concrete ideas that I learned about in college, and actually do use every year. For those of you who don't know, Literature Circles are a way to organize a novel study which encourages students to engage in authentic conversation about a book. As we know, as adults we rarely answer meaningless questions about the books we read... but instead, we discuss what we read in book clubs, with friends, or just in conversation with others.

With the Literature Circles format, each student has a role that they fulfill while reading the novel (or portion of a novel), and then they contribute to the conversation from the viewpoint of that role. There are lots of different roles that I've seen out there, but the ones that I stick to are...

Story Summarizer (this person summarizes the characters, setting, and plot of the reading)
Word Watcher (this role involves looking up definitions of vocabulary words from the reading)
Question Creator (this student needs to create and answer thought-provoking questions about the reading)
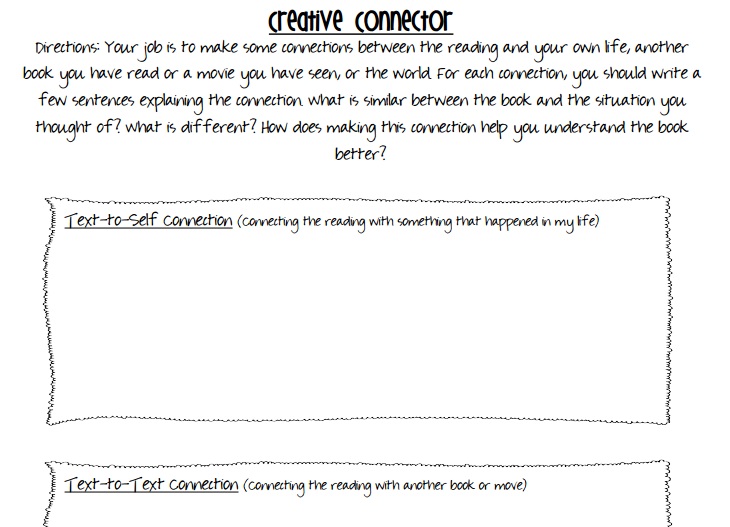
Creative Connector (this person comes up with a few different text-to-self, text-to-text, and text-to-world connections about the reading)
Imaginative Illustrator (to draw a picture of how they imagined a scene from the book)
...and, of course you need a Circle Supervisor (to keep the conversation focused and moving, and to make sure that everyone is participating equally)


The goal is for students to eventually be able to hold a meaningful conversation, with everyone participating equally, without teacher guidance... eventually. It usually takes quite a bit of practice to get my students there... we did one round of Literature Circles with The Lion, the Witch, and the Wardrobe (we used a condensed version of the Literature Circle worksheets, which is a FREEBIE that you can find here)... One of my main focuses the first time around with my students was building on what the last person said, rather than each person just saying their two cents without anyone else really paying attention. But once you see that the students are really able to dig into a cool book, it is really cool to see!

Next up, my students are going to tackle The Giver. We're going whole hog this time - the full role sheets, and hopefully I truly will be handing off the conversation to be fully student-led! (We'll see... it's not always easy for me to fully let go of the control! ha)


Monday, October 29, 2012

Good Morning, Friends!

Another day, another night, another blog entry... another great idea from my mom. :)

My first year of teaching, my mom gave me the idea for putting a morning greeting up on the SmartBoard every day. It's a great way to get kids engaged as soon as they walk in the door, and to make them feel welcome in our classroom.


So I spent my first few years building up a collection, and now, every morning when my students walk in there's a colorful and fun greeting on the SmartBoard for them to respond to. Sometimes they answer a question (like the one in a picture above), sometimes they do an activity (some academic and some not), and sometimes they just read a greeting from me.

The kids love these! They love responding themselves, and they love seeing what their friends said. At open house, I promise the kids that they will touch the SmartBoard every single day - and this makes sure that that's true!

I've posted a month's worth of premade morning greetings using Smart Notebook software up on my store on Teachers Pay Teachers, and I plan on continuing to do this - posting a month's worth of premade (but editable) greetings for teachers to use with their classes.

http://www.teacherspayteachers.com/Product/Daily-Morning-Greetings-for-SmartBoard

Hope you enjoy these as much as my class does!

-Michele :)

Friday, October 26, 2012

Frobscottle and Whizzpoppers!

Happy Friday, friends!

I love Roald Dahl. His books are so creative and so fun, for kids (and adults!) of all ages.

When I first started teaching, my mom suggested that I start out the year with The BFG by Roald Dahl as my first read aloud. She said it's funny, the kids love it, and it's a great way to start out the year - great advice! What a great mom. :)

Last year, after reading the BFG, my class had won a reward for showing good behavior, so we made it into a BFG movie-watching party, complete with Frobscottle. (I made sure to tell them that this frobscottle would NOT make them whizzpop!)


(I got the movie off of Amazon... http://www.amazon.com/Roald-Dahls-The-Friendly-Giant/dp/B000FOQ02I/ref=sr_1_2?ie=UTF8&qid=1351303560&sr=8-2&keywords=the+BFG)

After we finished the novel my first year, I developed some extension activities using The BFG as inspiration. I focused on creative writing, so all the options for their extension project include writing to some extent, but in different forms. The kids have really gotten into it every year!


Some of the activities include creating their own giant to fit in with the story, retelling the story (or parts of the story) from the perspective of a different character, or inventing dreams and their labels for the BFG's jar. Another one is to use the fun made-up words that the BFG uses and give them definitions based on how the BFG uses them.


Guess where you can find not only the description of the projects, but all the materials you need to have your students complete the projects AND a rubric to grade them?


What a day. I'm excited for the weekend! :) 

-Michele

Tuesday, October 23, 2012

Classroom Management

Another week on the job, friends! :)

Last year we implemented the "stoplight" behavior management system that I'm sure many of you are familiar with. Students start the day on "Green" (meaning, they are following all of our set PBIS expectations). If something happens over the course of the day, a child is moved to "Yellow" (meaning, slow down! Make a better choice!) and if the problem behavior continues, they move to "Red" (stop immediately and change what you're doing). I do allow the kids to earn their way back to green by taking responsibility for their actions and making a better choice.

This year we added another color - "Purple!" Our high school's mascot is the Purple Knight, so we use purple to indicate someone who is going above and beyond what is expected, who is being a true leader.

At the end of the day, we fill out a Weekly Progress Report. Here's what that looks like:


As you can see, there's a box for each day, which they color whatever color they ended the day on. (I know other teachers who, if the student changed colors throughout the day but earned their way back to green, has them color the box a couple different colors to indicate that). They also have to write one positive thing that happened that day.

I keep the Weekly Progress Reports in their Friday Folders. We fill them out each day, and then on Friday the students take them home and get them signed so parents know how the week went with their behavior.

I also have a box on this sheet where I write any missing class work or homework, and I staple the work to the page. There's also a box for Teacher Comments (I'll write questions, reminders about conferences, positive praise, explanations of why a student changed colors, etc) and a box for Parent Comments.

Lastly, at the bottom, I have the parent, student AND myself sign them, to show that we are all working together for the student's success!

Wondering where you can get a copy of this worksheet? Guess what... it's FREE! Check out my Teachers Pay Teachers page!

http://www.teacherspayteachers.com/Store/Michele-Kruse

Enjoy! :)

Michele

Friday, October 12, 2012

Election season!

Hi friends. :)

What a busy week! I had parent/teacher conferences this week, which consumed most of my time. Feeling like now I can finally enjoy our beautiful fall weather!

Ahh, fall... brings thoughts of caramel apples... cozy scarves... leaves changing color... hot cider with cinnamon... boots and sweaters... and... ELECTION!

I know, some of us are already sick of the political talk going around Facebook, TV, news, etc... But let's face it: our students are excited about it! And part of our job as teachers is to educate them on the many rights of citizens... including the very important right to vote.

I've always had an interest in politics - Political Science was one of my favorite courses in college. I suppose that teaching about elections gives me hope for the future - maybe one day, one of these students can make a change for the better in our political system. :)

Anyway... I came up with some ideas for teaching this election unit in my classroom.We started setting the groundwork a few weeks ago by reviewing the 3 Branches of Government (which they learned in the previous grade level). The big hit was a drama I did in which I split the class into 3 groups (Congress, President and Cabinet, and Supreme Court) and we acted out passing a law. The kids really got into that - especially the part where they elected classmates into the Presidency and into Congress by voting!

First up in our look at the presidential election: an adorable read aloud. Grace for President by Kelly DiPucchio.


I made up a few reflection questions to go with the story that I think we'll discuss as a group after reading the story. What I love about the book is that it is PERFECT for illustrating the Electoral College! It really is a must read for any elementary teacher who wants to cover elections.


So this is my next step: filling out a Presidential Election Timeline with all the events leading up to (and following) the election. The picture above is the teacher's guide version - I'm going to be giving students a blank timeline to fill out. We're going to be reading an article I found while we do it, but a lot of this will be filled in just through discussion.


On the opposite side of the timeline is this cute little worksheet I created, where we are going to define a few important terms relating to presidential elections.


Next, a graphic organizer that students will use to research a presidential candidate of their choice. (Of course, I'll make sure we have equal representation of all candidates in this portion). Then, we'll get together as a class and compare all the candidates - similarities, differences, etc.


Last up, to tie it all together: a homework assignment. I will ask students to interview a parent or other adult in their family about elections. I really think this is key: opening that door to communication between children and parents. It's tricky to teach about elections because they can be so value-based, and for me, I feel good about opening these lines of communication and including the parent in the child's education.

So... I bet you're wondering where to get all these awesome assignments, right?!?! Well let me tell you... At my Teachers Pay Teachers store! :)

http://www.teacherspayteachers.com/Store/Michele-Kruse

In summary: drink your cider, cuddle up in your sweater, and enjoy it, because before we know it, these election shenanigans will be over and it will be time for the long winter. :)

Michele