Friday, December 7, 2012

Long time no see!

Okay, so it's been awhile... I blame it on the holiday season. (Plus my crazy job... plus grad school... plus tutoring... etc etc etc, you get the picture).

I did have time to add something to my Teachers Pay Teachers store today... Literature Circle role sheets!


Literature Circles are one of the (unfortunately few) concrete ideas that I learned about in college, and actually do use every year. For those of you who don't know, Literature Circles are a way to organize a novel study which encourages students to engage in authentic conversation about a book. As we know, as adults we rarely answer meaningless questions about the books we read... but instead, we discuss what we read in book clubs, with friends, or just in conversation with others.

With the Literature Circles format, each student has a role that they fulfill while reading the novel (or portion of a novel), and then they contribute to the conversation from the viewpoint of that role. There are lots of different roles that I've seen out there, but the ones that I stick to are...

Story Summarizer (this person summarizes the characters, setting, and plot of the reading)
Word Watcher (this role involves looking up definitions of vocabulary words from the reading)
Question Creator (this student needs to create and answer thought-provoking questions about the reading)
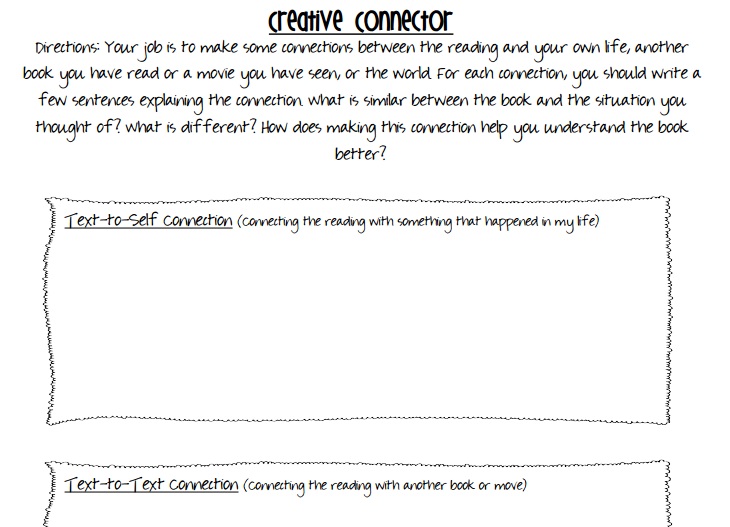
Creative Connector (this person comes up with a few different text-to-self, text-to-text, and text-to-world connections about the reading)
Imaginative Illustrator (to draw a picture of how they imagined a scene from the book)
...and, of course you need a Circle Supervisor (to keep the conversation focused and moving, and to make sure that everyone is participating equally)


The goal is for students to eventually be able to hold a meaningful conversation, with everyone participating equally, without teacher guidance... eventually. It usually takes quite a bit of practice to get my students there... we did one round of Literature Circles with The Lion, the Witch, and the Wardrobe (we used a condensed version of the Literature Circle worksheets, which is a FREEBIE that you can find here)... One of my main focuses the first time around with my students was building on what the last person said, rather than each person just saying their two cents without anyone else really paying attention. But once you see that the students are really able to dig into a cool book, it is really cool to see!

Next up, my students are going to tackle The Giver. We're going whole hog this time - the full role sheets, and hopefully I truly will be handing off the conversation to be fully student-led! (We'll see... it's not always easy for me to fully let go of the control! ha)


Monday, October 29, 2012

Good Morning, Friends!

Another day, another night, another blog entry... another great idea from my mom. :)

My first year of teaching, my mom gave me the idea for putting a morning greeting up on the SmartBoard every day. It's a great way to get kids engaged as soon as they walk in the door, and to make them feel welcome in our classroom.


So I spent my first few years building up a collection, and now, every morning when my students walk in there's a colorful and fun greeting on the SmartBoard for them to respond to. Sometimes they answer a question (like the one in a picture above), sometimes they do an activity (some academic and some not), and sometimes they just read a greeting from me.

The kids love these! They love responding themselves, and they love seeing what their friends said. At open house, I promise the kids that they will touch the SmartBoard every single day - and this makes sure that that's true!

I've posted a month's worth of premade morning greetings using Smart Notebook software up on my store on Teachers Pay Teachers, and I plan on continuing to do this - posting a month's worth of premade (but editable) greetings for teachers to use with their classes.

http://www.teacherspayteachers.com/Product/Daily-Morning-Greetings-for-SmartBoard

Hope you enjoy these as much as my class does!

-Michele :)

Friday, October 26, 2012

Frobscottle and Whizzpoppers!

Happy Friday, friends!

I love Roald Dahl. His books are so creative and so fun, for kids (and adults!) of all ages.

When I first started teaching, my mom suggested that I start out the year with The BFG by Roald Dahl as my first read aloud. She said it's funny, the kids love it, and it's a great way to start out the year - great advice! What a great mom. :)

Last year, after reading the BFG, my class had won a reward for showing good behavior, so we made it into a BFG movie-watching party, complete with Frobscottle. (I made sure to tell them that this frobscottle would NOT make them whizzpop!)


(I got the movie off of Amazon... http://www.amazon.com/Roald-Dahls-The-Friendly-Giant/dp/B000FOQ02I/ref=sr_1_2?ie=UTF8&qid=1351303560&sr=8-2&keywords=the+BFG)

After we finished the novel my first year, I developed some extension activities using The BFG as inspiration. I focused on creative writing, so all the options for their extension project include writing to some extent, but in different forms. The kids have really gotten into it every year!


Some of the activities include creating their own giant to fit in with the story, retelling the story (or parts of the story) from the perspective of a different character, or inventing dreams and their labels for the BFG's jar. Another one is to use the fun made-up words that the BFG uses and give them definitions based on how the BFG uses them.


Guess where you can find not only the description of the projects, but all the materials you need to have your students complete the projects AND a rubric to grade them?


What a day. I'm excited for the weekend! :) 

-Michele

Tuesday, October 23, 2012

Classroom Management

Another week on the job, friends! :)

Last year we implemented the "stoplight" behavior management system that I'm sure many of you are familiar with. Students start the day on "Green" (meaning, they are following all of our set PBIS expectations). If something happens over the course of the day, a child is moved to "Yellow" (meaning, slow down! Make a better choice!) and if the problem behavior continues, they move to "Red" (stop immediately and change what you're doing). I do allow the kids to earn their way back to green by taking responsibility for their actions and making a better choice.

This year we added another color - "Purple!" Our high school's mascot is the Purple Knight, so we use purple to indicate someone who is going above and beyond what is expected, who is being a true leader.

At the end of the day, we fill out a Weekly Progress Report. Here's what that looks like:


As you can see, there's a box for each day, which they color whatever color they ended the day on. (I know other teachers who, if the student changed colors throughout the day but earned their way back to green, has them color the box a couple different colors to indicate that). They also have to write one positive thing that happened that day.

I keep the Weekly Progress Reports in their Friday Folders. We fill them out each day, and then on Friday the students take them home and get them signed so parents know how the week went with their behavior.

I also have a box on this sheet where I write any missing class work or homework, and I staple the work to the page. There's also a box for Teacher Comments (I'll write questions, reminders about conferences, positive praise, explanations of why a student changed colors, etc) and a box for Parent Comments.

Lastly, at the bottom, I have the parent, student AND myself sign them, to show that we are all working together for the student's success!

Wondering where you can get a copy of this worksheet? Guess what... it's FREE! Check out my Teachers Pay Teachers page!

http://www.teacherspayteachers.com/Store/Michele-Kruse

Enjoy! :)

Michele

Friday, October 12, 2012

Election season!

Hi friends. :)

What a busy week! I had parent/teacher conferences this week, which consumed most of my time. Feeling like now I can finally enjoy our beautiful fall weather!

Ahh, fall... brings thoughts of caramel apples... cozy scarves... leaves changing color... hot cider with cinnamon... boots and sweaters... and... ELECTION!

I know, some of us are already sick of the political talk going around Facebook, TV, news, etc... But let's face it: our students are excited about it! And part of our job as teachers is to educate them on the many rights of citizens... including the very important right to vote.

I've always had an interest in politics - Political Science was one of my favorite courses in college. I suppose that teaching about elections gives me hope for the future - maybe one day, one of these students can make a change for the better in our political system. :)

Anyway... I came up with some ideas for teaching this election unit in my classroom.We started setting the groundwork a few weeks ago by reviewing the 3 Branches of Government (which they learned in the previous grade level). The big hit was a drama I did in which I split the class into 3 groups (Congress, President and Cabinet, and Supreme Court) and we acted out passing a law. The kids really got into that - especially the part where they elected classmates into the Presidency and into Congress by voting!

First up in our look at the presidential election: an adorable read aloud. Grace for President by Kelly DiPucchio.


I made up a few reflection questions to go with the story that I think we'll discuss as a group after reading the story. What I love about the book is that it is PERFECT for illustrating the Electoral College! It really is a must read for any elementary teacher who wants to cover elections.


So this is my next step: filling out a Presidential Election Timeline with all the events leading up to (and following) the election. The picture above is the teacher's guide version - I'm going to be giving students a blank timeline to fill out. We're going to be reading an article I found while we do it, but a lot of this will be filled in just through discussion.


On the opposite side of the timeline is this cute little worksheet I created, where we are going to define a few important terms relating to presidential elections.


Next, a graphic organizer that students will use to research a presidential candidate of their choice. (Of course, I'll make sure we have equal representation of all candidates in this portion). Then, we'll get together as a class and compare all the candidates - similarities, differences, etc.


Last up, to tie it all together: a homework assignment. I will ask students to interview a parent or other adult in their family about elections. I really think this is key: opening that door to communication between children and parents. It's tricky to teach about elections because they can be so value-based, and for me, I feel good about opening these lines of communication and including the parent in the child's education.

So... I bet you're wondering where to get all these awesome assignments, right?!?! Well let me tell you... At my Teachers Pay Teachers store! :)

http://www.teacherspayteachers.com/Store/Michele-Kruse

In summary: drink your cider, cuddle up in your sweater, and enjoy it, because before we know it, these election shenanigans will be over and it will be time for the long winter. :)

Michele

Saturday, October 6, 2012

My version of the "Teacher Binder"

Hi friends. :)

So as I'm sure all my fellow Pinterest-ites have noticed, posts on the infamous "Teacher Binder" have been very popular. I think this is one of those things that everyone does, but in a slightly different way. But it's fun to see how everybody else does it... I know that my Teacher Binder has definitely evolved over my years of teaching, not only from me figuring out what I wanted and matching it to my needs, but also from picking up bits and pieces from other teacher binders that I've seen on blogs and Pinterest.

So, here's how I organize my "Teacher Binder"...


Sections


  • A section for each subject... Reading, Language Arts, Math, and Social Studies. (I don't teach Science, otherwise I would have a section for that as well).
  • Staff Meeting and PLC Notes
  • Committee Notes
  • School Bulletins
  • Miscellaneous
  • Student Info

Subject Area Sections


Each of the subject area sections has a bunch of pages with a class grid. (My class grid is a Word document which has a table in it taking up the whole page. In the first column, I list every student's name and number, and then the rest of the columns are blank. I use that to record grades, check off completed homework, etc. If you look at the picture up by the list of sections, you can see part of one of my homework check-off pages). I match these grid pages up to our report card standards. So, for example, in the "Math" section, I have one page for each of our substandards on our district's report card (Mathematical Process, Number and Operations, Geometry, etc). Whenever I grade an assignment, I record the grade on the page of the standard with which the assignment correlates. If an assignment correlates with multiple standards, then I record the grade on multiple pages. That way, when report card time comes, I have everything already recorded on one sheet of paper and it's a matter of simply finding an average.

I also put any important documents relating to that subject at the front of the section. In the picture above, you can see our Fountas & Pinnell reading level correlation chart, along with our A.R. color coding system in place in my building. Other things that I keep in the subject area sections: pacing guides, lists of students' Fountas & Pinnell reading levels or A.R. reading levels, etc.

Staff Meeting/PLC Meeting/Committee Meeting Notes
These sections just have blank papers in them that I can use to make notes. One section is for staff meetings and grade-level PLC meetings, and the other is for our Parent/Community Outreach Committee notes, which I am a part of. It's helpful to keep the notes here instead of in a file folder (which is what I used to do) because then I don't have to worry about digging up the file for a meeting - it's all right in my binder (which I have with me practically at all times!)

School Bulletins
Here, I keep our Staff BiWeekly Bulletins, which my principal creates. First, I highlight all applicable info, and then I immediately 3-hole-punch it and stick it in there - I don't even let the paper leave my hands! That's crucial for me - in previous years, I would put it down somewhere and think, "I'll take care of this later." That's usually when I lost it. ;)

Miscellaneous 
Here's where I keep all those things that don't really have a spot, but I don't want to lose either. Examples: my list of who has received Star Awards each month (more to come on that in a later blog post), check-off grids for who has turned in their reading calendar, field trip permission slips and money, etc.

Student Info
The first few documents in this tab include a list of student birthdays, a master list of MAPS scores, and usernames and passwords for my students. The rest of the information is contact info. At open house, I have parents fill out a form with their phone numbers, email addresses, home addresses, the best way to contact them, and some other crucial questions. (Again, I'll make another blog post with the specifics on this later). Once parents turn those papers in, I keep them in this section of the binder, for easy access when I need to contact them. 


Lastly, in the back of the binder, I bought a 3-hole punch that can fit into a binder, and I keep my easy grader in the back pocket for easy access while grading.

I hope this is helpful! :)

-Michele

My first freebie!

Okay, friends... I'm giving this a try! :)

Last year I created a worksheet for my students to use to set goals for themselves for MAPS testing. So many of us are using the NWEA MAPS testing system to monitor our students' growth throughout the year. I wanted to give my students ownership over these scores, so that they would become more than just an unknown number presented to their parents at conferences.

Thus, I created this goal-setting sheet. In my district, we take MAPS three times a year. After our first MAPS session in the fall, we have a discussion about what this test is, and what I (as the teacher) am looking for (growth! growth! growth!) We talk about what "typical" growth means, and once our discussion is finished, the students take some reflective time to set a goal for themselves for the Winter MAPS.

We do a check-in after Winter MAPS, to see how they matched up with their goals, and then we set another goal for the Spring MAPS.

So here's the link to where this document can be found as a free download...

http://www.teacherspayteachers.com/Product/Take-the-MAPS-Challenge-A-goal-setting-worksheet

Enjoy! :)
-Michele

My first post! :)

Hello everyone!

I'm very excited to begin my BadgerBuddies blog! I've always admired all those teachers out there with their fancy blogs - beautiful photos and banners, full of amazing content... and I've always wondered how they found the time to do all that! We all know how time consuming being a teacher can be... I could spend all weekend in my classroom just working on stuff for myself!

But, I've always enjoyed sharing the things I create with my coworkers, seeing how they can benefit from my work. And vice versa, of course... I love getting ideas and inspiration from my fellow teachers that I admire.

We'll see how this blogging thing goes! ;)